Battle of Cedar Creek Civil War Reenactment

Battle of Cedar Creek Civil War Reenactment

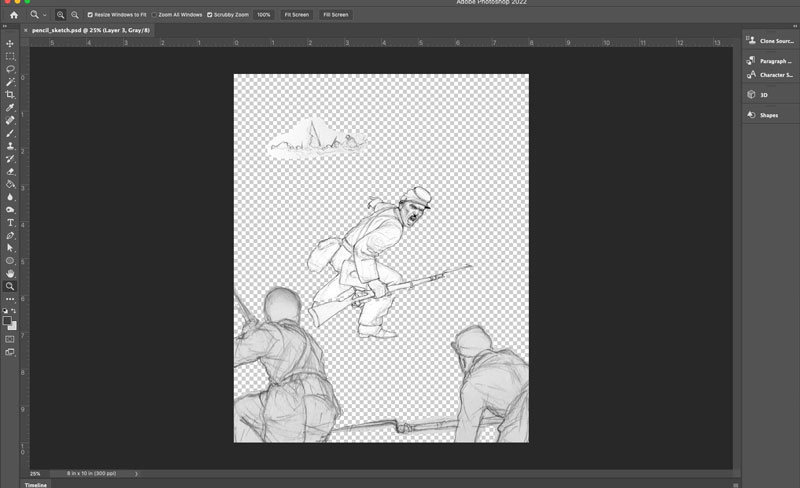
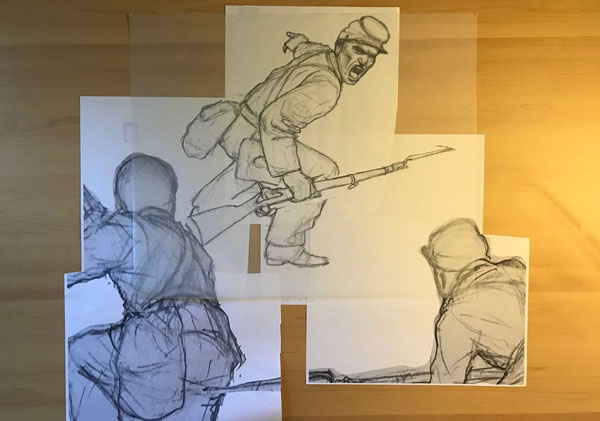
Sometimes I like to attend Reenactments to obtain reference photos for my art. One of the best I have seen was in 2015, when my wife and I went to the Battle of Cedar Creek Civil War Reenactment.

Battle of Cedar Creek Reenactment in 2015.

The Battle

The Battle of Cedar Creek took place in October 19, 1864, in the Shenandoah Valley of Virginia, near Middletown. The Confederate forces, under Lieutenant General Jubal Early, appeared close to victory in the morning. But Major General Philip Sheridan, commander of the Union forces, rallied his men in the afternoon and drove off the opposing forces.

The Reenactment

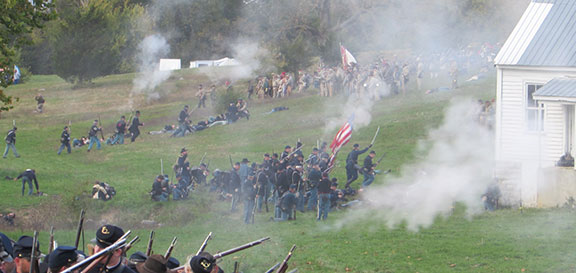
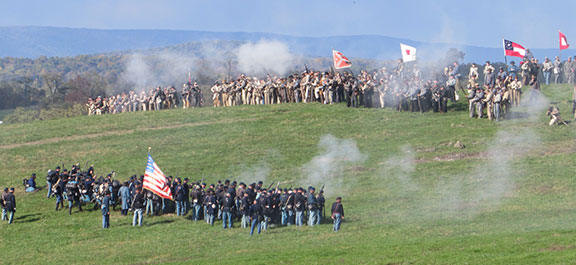
There are several cool things about this civil war reenactment that were different from others I have attended. The first is that I believe it is the only reenactment that takes place on the actual grounds of the fighting. Another is that it takes place in mid October, so you don’t have to deal with the extreme heat as you would in other reenactments. The cool weather (we wore light jackets) made it quiet comfortable for us and the viewing public. And I am sure it is a relief for the reenactors themselves, having to wear heavy, thick uniforms of the period. Lastly, the view is quiet spectacular. We were elevated enough to get a grand view of the show (as you can see from the photos I took). And with the Blue Ridge Mountains in the background, the panoramic scene is quite beautiful.

View of the Battle of Cedar Creek Reenactment, with the Blue Ridge Mountains in the background.

If you would like to attend the 2022 reenactment, click on the link below:
158th Anniversary Reenactment of the Battle of Cedar Creek, October 15th and 16th, 2022.

To find out more about the battle, you can check out the The American Battlefield Trust site.
Cedar Creek Battle Facts and Summary

Using Photoshop to transfer a sketch to canvas

How I use Photoshop to transfer a sketch to canvas.

There are many ways of transferring a sketch to canvas for painting. I used to use a grid system, since my painting area is always larger than my pencil drawing. But since I have a computer and a printer, I am now using Photoshop to transfer a sketch to canvas. The following is how I do it.

For this example, I will refer to the painting I am currently working on, The Battle of Chaffin’s Farm. You can read more about this in a previous post here.

I begin with the sketch, which I usually do on a standard drawing pad, and then I scan the art. If the drawing is too big for the scanner, I scan one part, then scan another part. In this case, the main figure is one sketch. The foreground figures are another sketch. Usually I set the scan for 150 dpi, although it really doesn’t matter. As long as it can print out a rough of the drawing.

Using Photoshop

Now I move over to Photoshop. When I take the drawing or drawings into Photoshop, I like as much contrast as possible. I achieve this by going to Image > Adjustments > Brightness/Contrast. Then I cut and past the images into a new Photoshop document. In the new document, I try to match the proportions of the final artwork as close as I can. For a 30″ x 24″ canvas, I set the artboard size to 10″ x 8″. So now I should have the drawings in the new document, each on its own layer.

The great thing about using Photoshop, I can move elements around. In this case, I felt the 2 foreground figures were too close to the main figure. So I just moved them down a bit. Another thing is that I can add to the sketch if necessary. In this example, I did not like that the rifle of the central soldier extends off the artboard. It would work better if the rifle is at more of an angle. So I just redrew only the hand and the rifle, scanned that, and then imported into the Photoshop file, replacing the old rifle.

The Battle of Chaffin’s Farm sketch scanned into Adobe Photoshop

Printing out the enlarged sketch

Once everything looks good, I need to print out the sketch for transferring to the canvas. Since the canvas size is 3 times the artboard size, I print out at 300%. Since I only can print out on letter size paper, I will tile the sketch and then tape the papers together. As you can see in the images, I printed out 5 sections of the sketch. Once printed, I just used tape assemble the prints.

Using Photoshop to transfer a sketch to canvas. 3 printouts of drawing enlarged on letter size paper.
3 printouts on standard 8.5 x 11 paper.
The Battle of Chaffin’s Farm sketch. Readying for transfer to canvas for painting.

The 5 assembled printouts laid out and ready for transfer to canvas.

Now I lay a sheet of tracing paper over the enlarged printout of the sketch. Using the method described here, I use the tracing paper to transfer the drawing to the canvas.

If you don’t have access to scanner or printer, I have attached a link on other methods to transfer a drawing.
How to transfer an image onto canvas